An Alternative Method for Recovering Data from a Damaged SSD
- Feb 23
- 3 min read
An Alternative Method for Recovering Data from a Damaged SSD
When conventional solutions do not address your problem, it may be necessary to adjust your approach and explore experimental methods. Here, we will discuss an alternative technique for recovering data from a damaged SSD.
Several years ago, our company transitioned from using the PC-3000 Flash to the PC-3000 SSD for working with SSDs. Why did we make this change?
The primary reason was that recovering data using the chip-off method from SSDs was both challenging and time-intensive. It typically took about a week to determine the correct order of the memory chips, correct ECC errors, remove all controller preparations, and finally, construct the image.
This process was quite cumbersome even then, and today, recovering data from SSDs using the chip-off method has become more complex due to the full encryption of data within the NAND memory chip or encryption with the AES-128 key.
These challenges can be effectively addressed and bypassed using the PC-3000 SSD Software in conjunction with the PC-3000 Express/UDMA/Portable III tools. With each update, we continue to add more SSDs and features to enhance functionality.
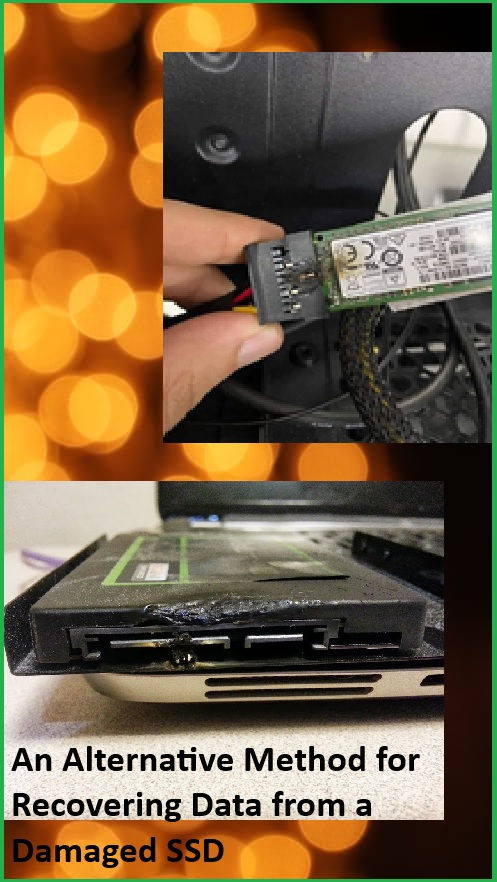
However, there are situations where the unsoldering method is necessary for data recovery from an SSD, and it can be successful. One of our users approached us with a Patriot Blast featuring a PS3110 controller and 120GB capacity. This drive had suffered from burnt components on the PCB and a failed CPU due to a short circuit. We proposed a solution: remove the chips from the damaged PCB and solder them onto a new one from a donor. However, locating the same model took some time, and the manufacturer had altered the PCB design. Let’s examine the pictures!


As observed, there is a notable difference in the size of the PCB; however, the primary components, such as the controller and the number of chips, remain consistent. This indicated a potential for successful functionality.
The following steps were undertaken:
An Alternative Method for Recovering Data from a Damaged SSD
1. All chips were labeled according to their location names (U5, U6, U7, U8). These identifiers can be found on the PCB adjacent to the chips.

2. The memory chips were unsoldered using Rose’s metal, which was employed to reduce the melting temperature and prevent damage to the NAND chips.
3. The memory chips were soldered onto the designated locations on the donor PCB (U5, U6, U7, U8). It is essential to maintain the same order for the chips (U5 to U5, U6 to U6…).

In the end, the SSD started without problems. There was no need to upload the LDR (loader) or build the translator. The client even said that it worked just like before the short circuit.
In case if the drive didn’t start working as before the short circuit, we should have tried to upload the LDR to make sure whether it would work well in the TechnoMode. Sometimes there might be a combination of SSD injuries: the hardware corruption of the PCB and the logical damage of the firmware area. In this case, the PC-3000 would be the only option:

This is it! Let’s summarize what you need to have and do to recover data from an SSD with a burnt PCB:
1. Find a compatible donor. It should be from the same model, have the same controller and capacity as your patient SSD. (Some manufactures use different controllers in one model, so you need to be very attentive)2. Transfer the chips from the patient PCB to the donor with the same chip layout.
If you have any questions, please contact our Technical Support department.
Ask your question
Write an answer
Write an answer

